什么是脚手架?
当我们建造房子的时候,工地上会先搭个架子,然后工人们会在这个的基础上添砖加瓦,直到房屋成型。那么我们程序也是这样的道理,会在我们开发之前有一套相对成熟且适用的架子(配置项、技术栈),然后我们会在这基础上直接产出需求功能,而需求重复的造架子。脚手架在我们开发项目中也是极其重要,能够提高我们的开发。
那么我们开发中有用到哪些脚手架呢?有vue-cli、create-react-app、yeoman等。
Yeoman
yeoman较真来讲更应该称为脚手架框架,因为它不能直接创建项目文件,而是提供了一套完整的开发API,可以通过这些API来灵活地来制造符合你需求的脚手架方案。
开始
我们先来创建一个yeoman脚手架生成器,注意文件夹的名字得为generator-开头,如generator-vuecli、generator-createapp。
npm install --global yomkdir generator-testcli && cd generator-testclinpm init,生成package.json需要主要几点:- name 属性必须带有前缀
generator- - keywords 属性必须含有
yeoman-generator;
- name 属性必须带有前缀
npm install --save yeoman-generator
yeoman-generator:yeoman 会根据用户选择的 generator 下载的本地,其中 generator 指的是一套具有模板的项目。
在官方例子中generator-fountain-webapp就是其中的一个generator。当然你也可以选择你要的generator,如输入命令行yo,会有选项Install a generator让你选择你想要安装的generator。
提示:假如安装过程报Error: EACCES, permission denied错误,请使用sudo npm进行安装。
目录结构
yeoman支持两种不同的目录结构:./ 和 ./generators。即:1
2
3
4
5
6
7
8
9
10
11
12|---- package.json
|---- generators/
|---- app/
|---- index.js
|---- router/
|---- index.js
############################################
|---- package.json
|---- app/
|---- index.js
|---- router/
|---- index.js
重写构造函数
某些生成器方法只能在构造函数内部调用。这些特殊方法可能会执行诸如设置重要状态控件之类的操作,并且可能无法在构造函数之外运行。1
2
3
4
5
6
7
8
9
10
11
12var Generator = require('yeoman-generator');
module.exports = class extends Generator {
// The name `constructor` is important here
constructor(args, opts) {
// Calling the super constructor is important so our generator is correctly set up
super(args, opts);
// Next, add your custom code
this.option('babel'); // This method adds support for a `--babel` flag
}
};
添加功能函数
1 | method1() { |
完整代码为:1
2
3
4
5
6
7
8
9
10
11
12
13
14
15
16
17
18
19
20var Generator = require('yeoman-generator');
module.exports = class extends Generator {
// The name `constructor` is important here
constructor(args, opts) {
// Calling the super constructor is important so our generator is correctly set up
super(args, opts);
// Next, add your custom code
this.option('babel'); // This method adds support for a `--babel` flag
}
method1() {
  this.log('method 1 just ran');
}

method2() {
  this.log('method 2 just ran');
}
};
npm绑定全局
使用 npm 创建一个node全局模块,并且连接到本地。在脚手架项目根目录下generator-name/,输入npm link。
执行
yo testcli,会出现如下图信息。
到这里一个小小的官方demo已经执行完成了,更多的可以查看Writing Your Own Yeoman Generator | Yeoman
自定义前端脚手架
刚才在上问已经说了,yeoman实际上更像是一个脚手架框架,可以通过它来打造各种利器(脚手架)。那我们现在就从头开始学习下怎么打造一个利器。
我们现在就来简单的做一个小栗子,执行init时会拉取GitHub上面的代码。上面已经说过了,实际上就是相当于clone一个基础项目到本地。
起步
我们把这个项目称为messi吧。
mkdir messi && cd messi;npm init(此处的package.json就没有yeoman那样需要name跟key有前缀的要求了);npm install --save chalk co co-prompt commander
入口文件
我们在根目录创建/bin文件夹,然后在该文件夹创建的文件messi.js。即bin/messi.js为我们这个项目的入口文件。
1 | // bin/messi.js |
挂载全局
其实这样就可以看到效果了。我们现在在package.json添加以下配置,表示全局钩子messi的加载文件是bin/messi.js。
例如:1
2>>> /usr/local/bin/messi -> /usr/local/lib/node_modules/messi/bin/messi.js
>>> /usr/local/lib/node_modules/messi -> /Users/xxx/Documents/study/messi
package.json1
2
3"bin": {
"messi": "bin/messi.js"
}
然后在根目录执行npm link或sudo npm link。打开另一个terminal标签执行messi命令。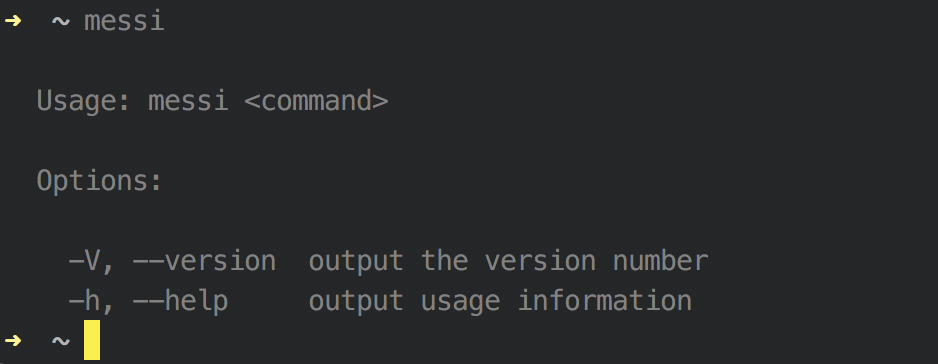
添加init模版
我们在根目录创建command文件夹,然后在其文件夹创建我们的主角init.js。目的是想通过init从远端仓库拉取一个项目模板。
我们需要在messi.js添加了相对应的命令行。1
2
3
4
5
6
7
8// messi.js
const init = require('../init');
program
.command('init')
.description('创建新项目')
.alias('i')
.action(() => { init(); });
然后我们需要在init.js添加逻辑代码。1
2
3
4
5
6
7
8
9
10
11
12
13
14
15
16
17
18
19
20
21
22
23
24
25
26
27
28
29
30
31
32// init.js
const co = require('co');
const chalk = require('chalk')
const prompt = require('co-prompt');
const exec = require('child_process').exec;
module.exports = () => {
console.log(chalk.white('init...'));
co(function *() {
let pull = yield prompt('你是否想要拉取scaffold-cli项目? y/n ');
pull = pull.toLowerCase();
if (pull === 'n') {
console.log(chalk.red('已经成功退出!'));
process.exit()
} else if (pull === 'y') {
const projectName = yield prompt('项目名称:');
const gitCmd = `git clone git@github.com:Lucius0/scaffold-cli.git ${projectName} && cd ${projectName} && git checkout master`;
console.log(chalk.white('开始拉取...'));
exec(gitCmd, (error, stdout, stderr) => {
if (error) {
console.log(error);
process.exit();
}
console.log(chalk.green('拉取成功!'));
process.exit()
});
}
});
};
到此刻为止,我们基本上的一个小demo已经完成了。关于exec方法,可以阅览exec。
目录结构
1 | |__ bin |
emmm。是不是感觉有些缺少什么?是的,我们如何能做到跟vue-cli一样优秀,可以自主选择自己想要的选择(有点拗口)。
inquirer
常用交互式命令行用户界面的集合。
具体的官方文档可以看 -> inquirer,我们来简单的展示一下使用方法。首先npm install --save inquirer,然后在messi.js添加我们跟init.js功能一样的指令init2以及在init2.js添加相对应的逻辑。1
2
3
4
5
6
7
8
9
10
11
12
13
14
15
16
17
18
19
20
21
22
23
24
25
26
27
28
29
30
31
32
33
34
35
36
37
38
39
40
41
42
43
44
45
46
47
48
49
50
51
52
53
54
55
56
57
58
59
60
61
62
63
64
65
66
67
68
69
70// messi.js
const init2 = require('../command/init2');
program
.command('init2')
.description('创建新项目')
.alias('i2')
.action(() => {
init2();
});
// init2.js
const co = require('co');
const chalk = require('chalk')
const inquirer = require('inquirer');
const exec = require('child_process').exec;
module.exports = () => {
console.log(chalk.white('init...'));
co(function *() {
var promps = [];
promps.push({
type: 'list',
name: 'pullProject',
message: '你是否想要拉取scaffold-cli项目?',
choices: [{
name: 'Yes',
value: 'y'
}, {
name: 'No',
value: 'n'
}]
});
inquirer.prompt(promps).then((answers) => {
console.log(answers);
const wanna = answers['pullProject'].toLowerCase();
if (wanna === 'n') {
console.log(chalk.red('已经成功退出!'));
process.exit()
} else if (wanna === 'y') {
promps = [];
promps.push({
type: 'input',
name: 'nameProject',
message: '项目名称:'
});
inquirer.prompt(promps).then((answers) => {
const projectName = answers['nameProject'];
const gitCmd = `git clone git@github.com:Lucius0/scaffold-cli.git ${projectName} && cd ${projectName} && git checkout master`;
console.log(chalk.white('开始拉取...'));
exec(gitCmd, (error, stdout, stderr) => {
if (error) {
console.log(error);
process.exit();
}
console.log(chalk.green('拉取成功!'));
console.log(`cd ${projectName}`);
exec(`cd ${projectName}`, () => {
process.exit();
});
});
});
}
});
});
};
接下来一步就是构建项目npm link,然后执行messi ini2。
好了。。。。。。睡觉。。。。。。。

